Android Development Tutorial
Tutorial Materials
Tutorial Video
Tutorial Slides
Click on the button below to download the tutorial slides.
Getting Started
Please follow these instructions before the tutorial begins to install Android Studio (the integrated development environment, or IDE, for building Android Apps) and configure an Android emulator (a virtual device that will allow you to run and test your prototype application).
Installing Android Studio
Please visit https://developer.android.com/studio in order to download the version of Android studio for the operating system that you use. All major operating systems, including macOS, Windows, and most flavors of Linux are supported.
Follow the instructions for your specific operating system to finish the installation. You can find a detailed guide for specific operating systems here.
Configuring Your Android Emulator
Once you have installed Android studio, either navigate to the launch screen view or the code editor view in order to launch the AVD Manager. See the screenshots below to see the steps involved in doing this.
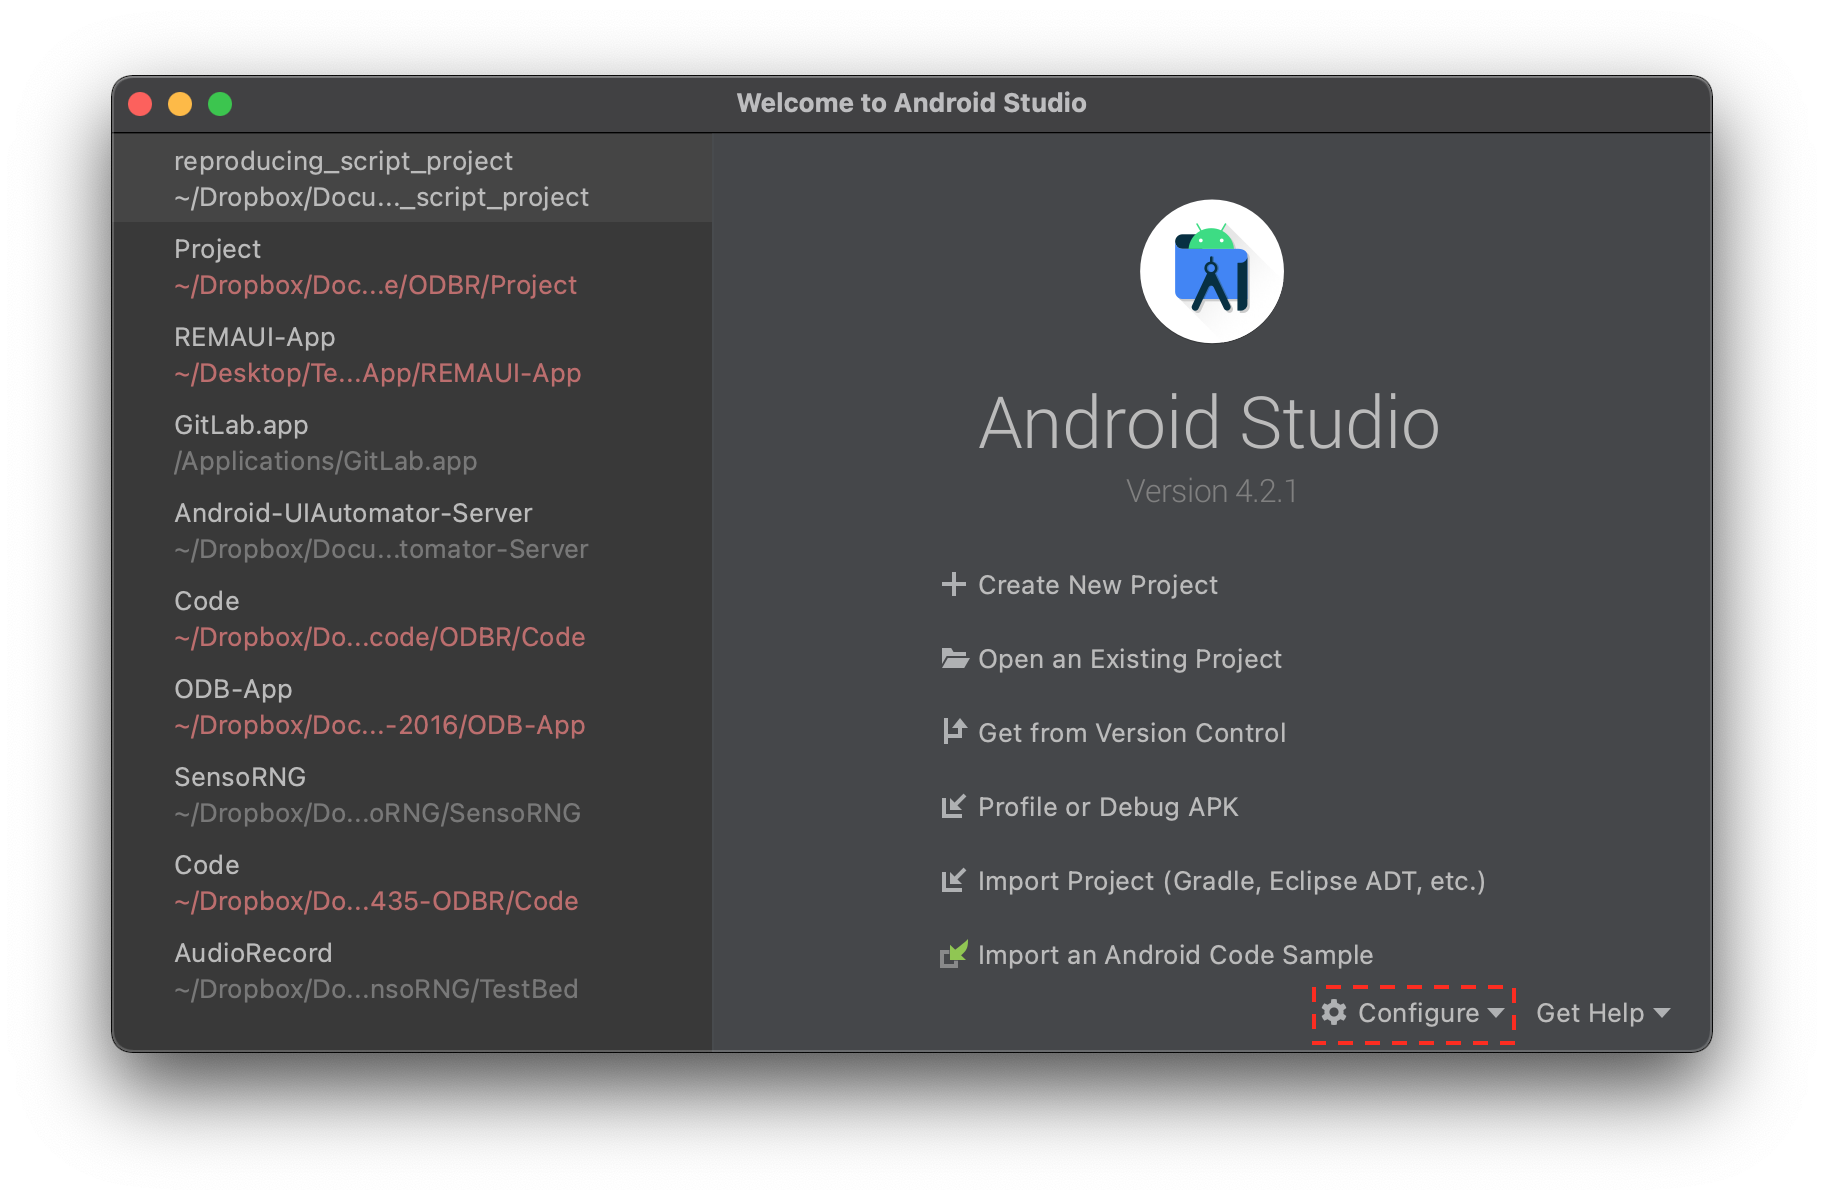 1. First click on the "Configure" button at the bottom of the splash screen.
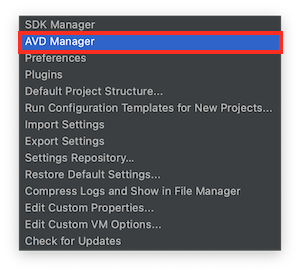 2. Click on the "AVD Manager" option to launch the configurator for the virtual Android Devices.
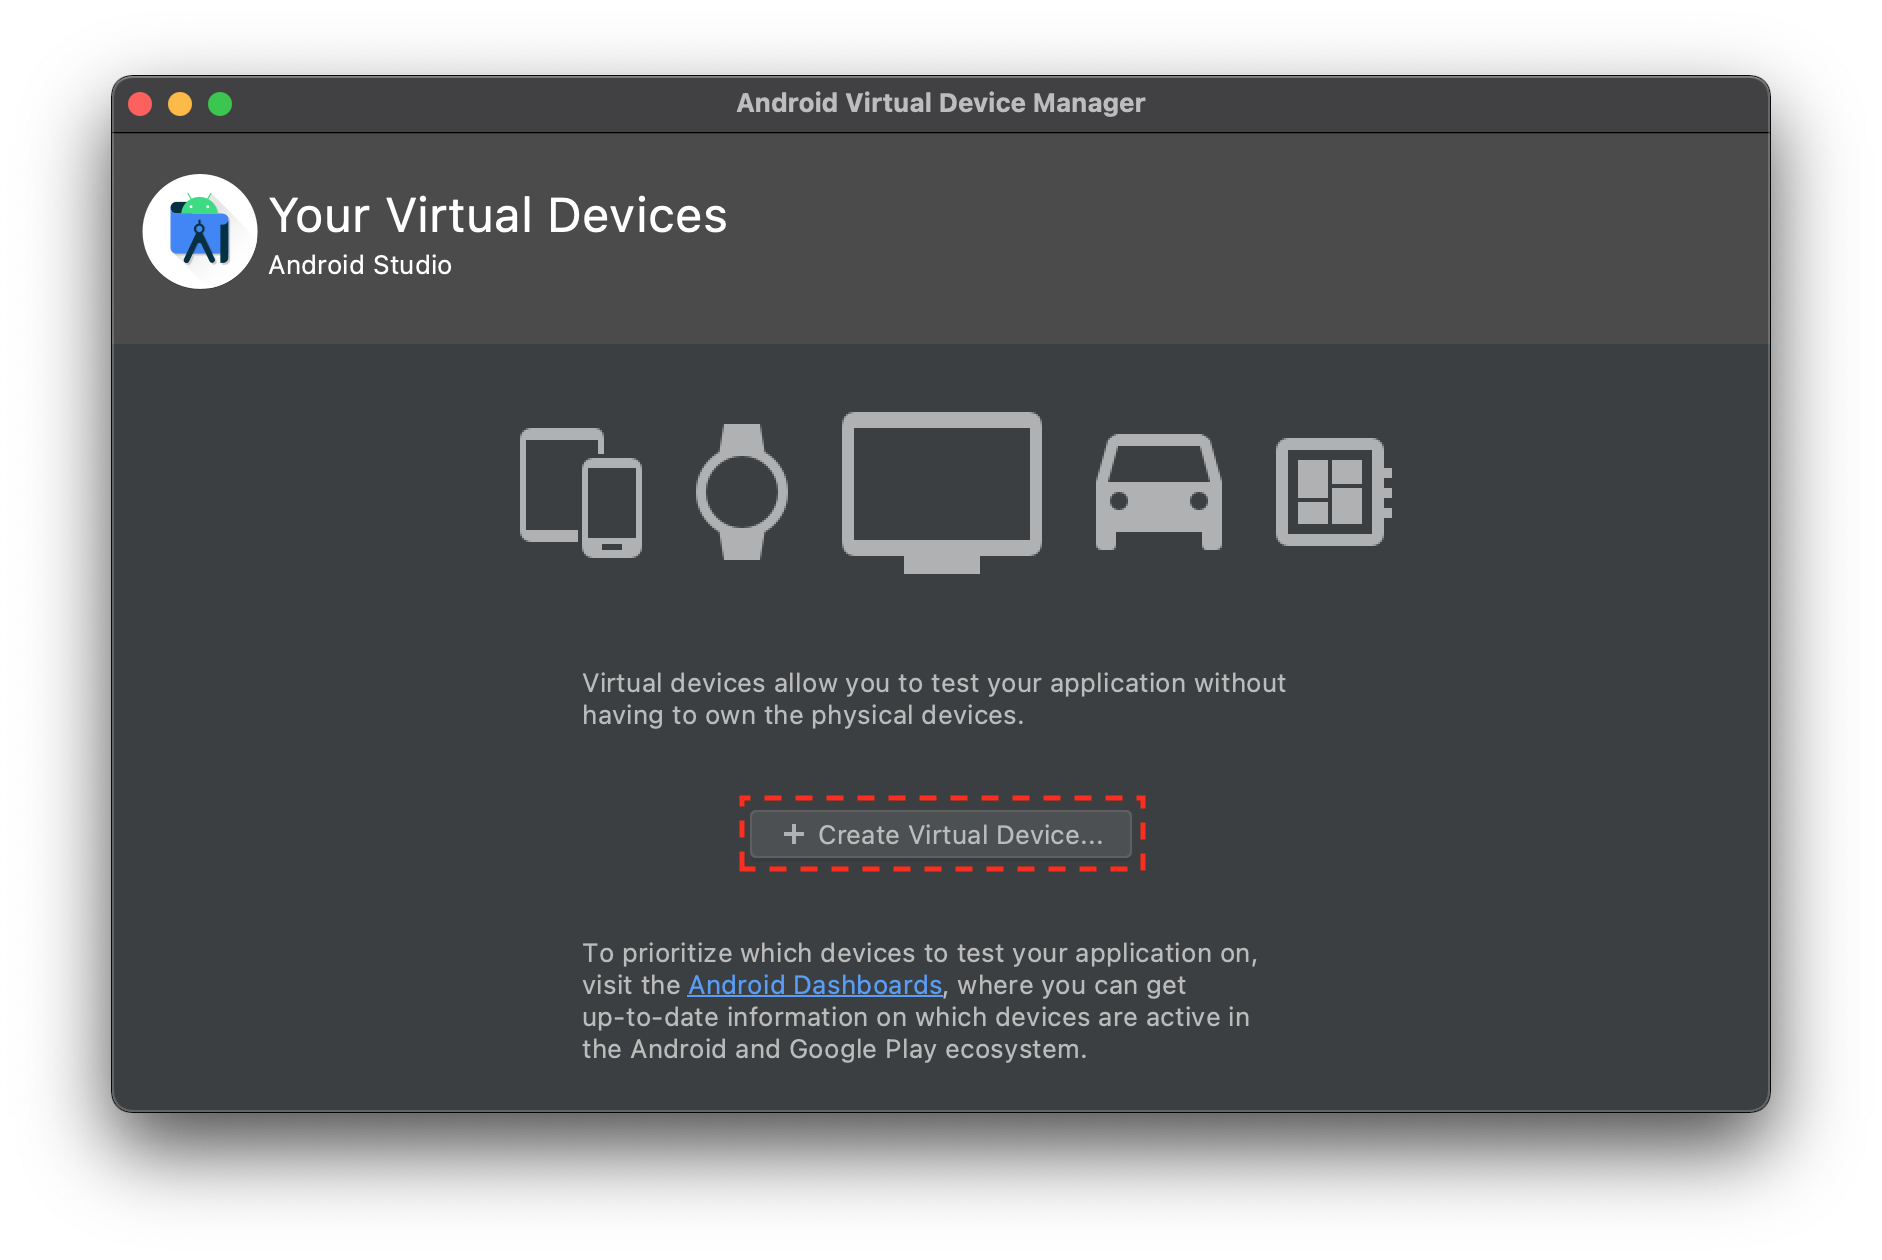 3. Click on the "+ Create Virtual Device" button to launch the configurator wizard.
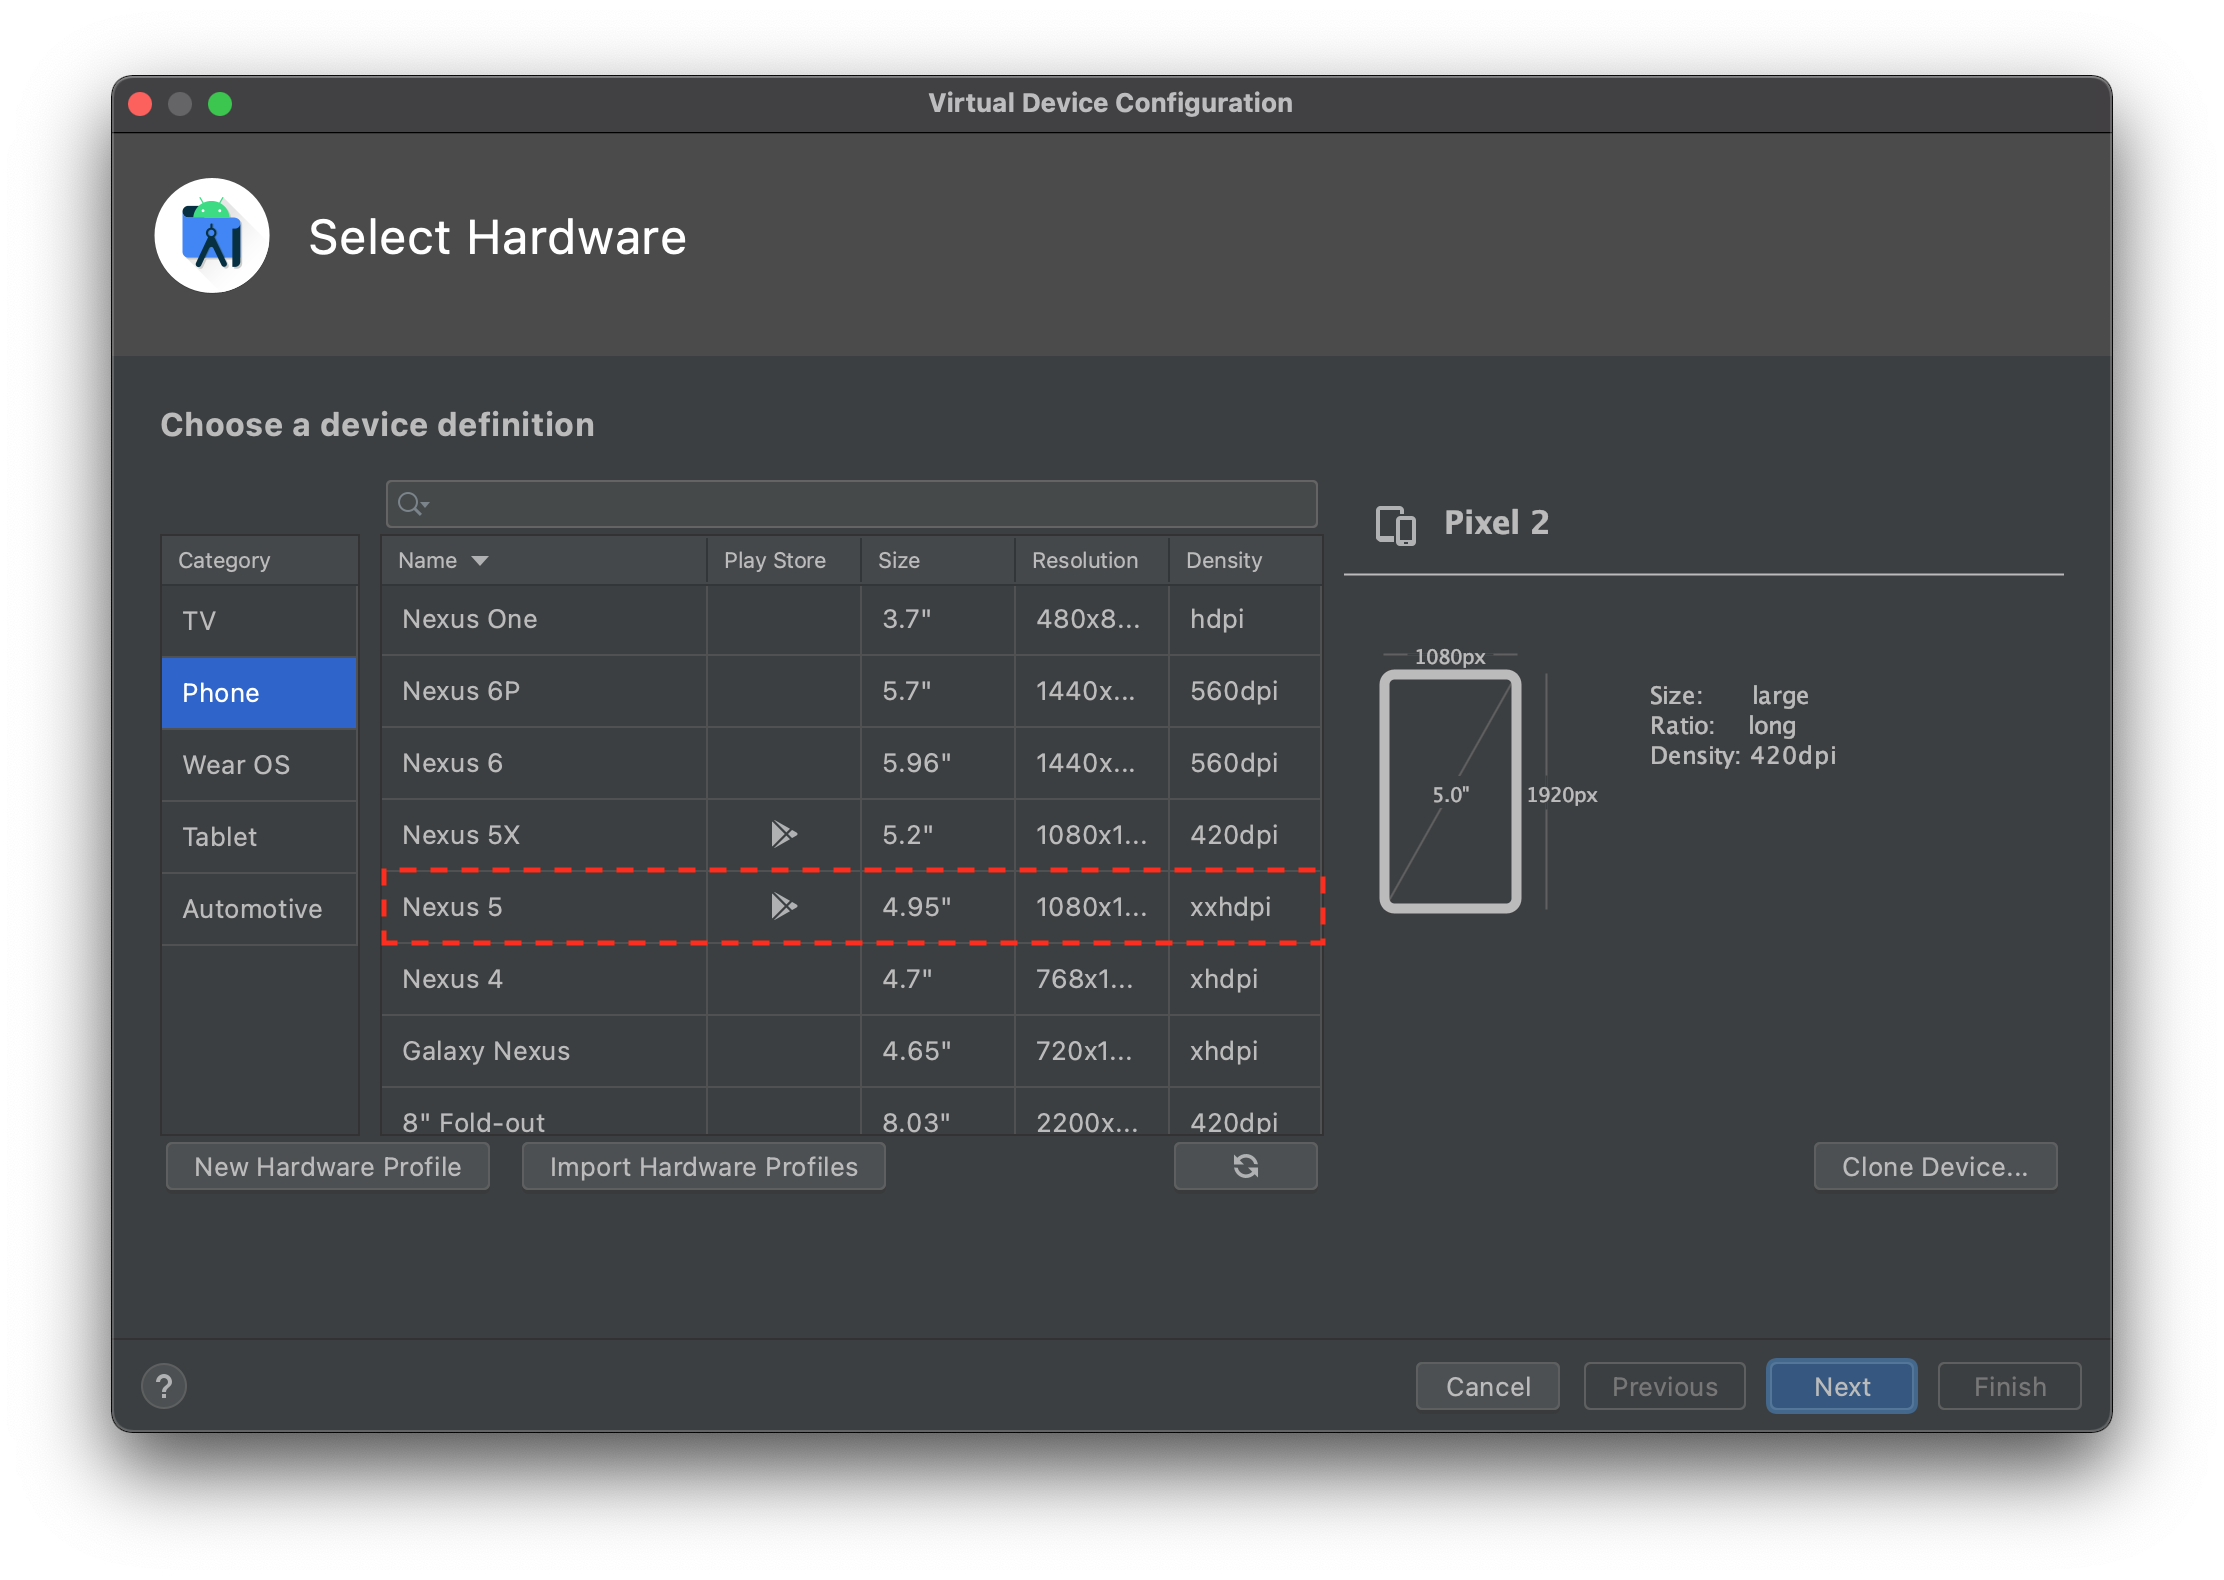 4. The first screen of the configurator wizard allows you to pick the hardware settings of your virtual Android device. This includes attributes such as the device screen size and pixel density. For the purposes of this tutorial, we will be using the Nexus 5 emulator, which you can select by scrolling to and clicking on the hardware configuration as shown in the above screenshot. After you have selected the Nexus 5 profile, you can click the "Next" button.
 5. Next we need to configure the software that our Android emulator will run on. The wizard allows you to select from many different Android versions, some of which contain proprietary Google Play APIs. For the purposes of this tutorial, we will be using Android 7.0 (also called Nougat) as it has good compatibility across a range of Android devices. To use this version, you first click on the Download button, to download the software image. After the download is complete, you can then select the software version in the configuration wizard and click the "Next" button.
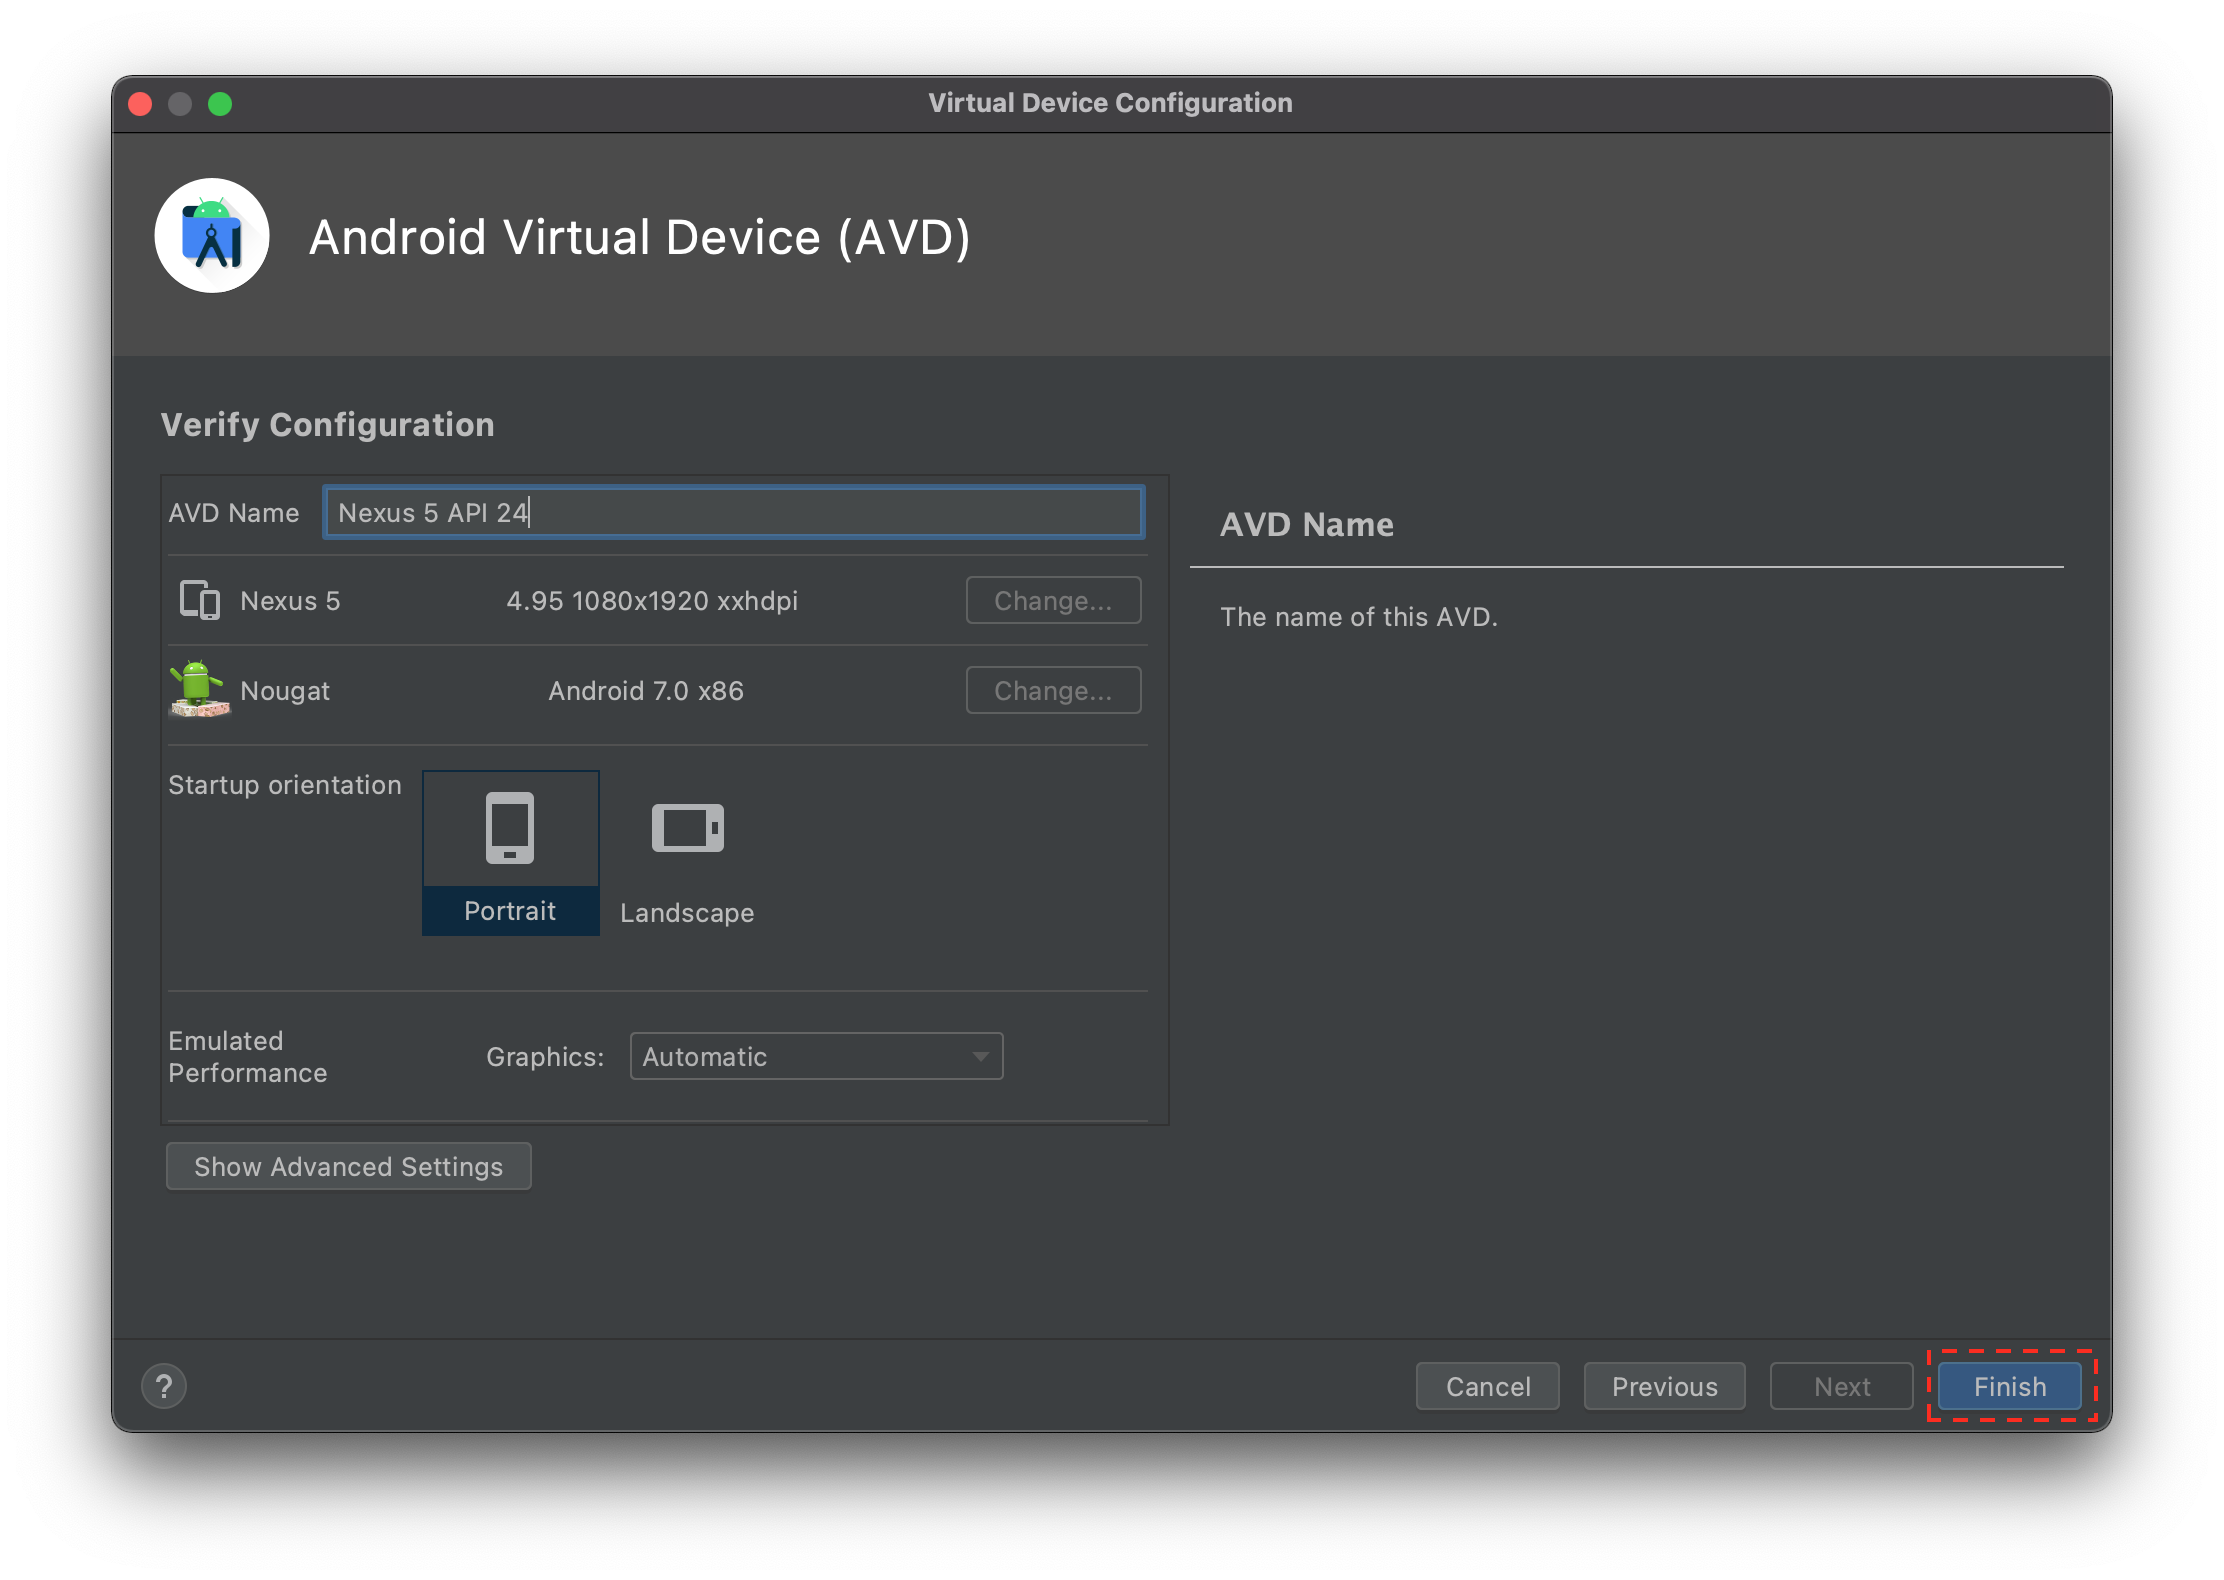 6. The Final screen of the configuration wizard provides some more advanced options and provides general information about the device you configured. For the purposes of this tutorial, we do not need to worry about advanced options, so you can simply click on the "Finish" button.
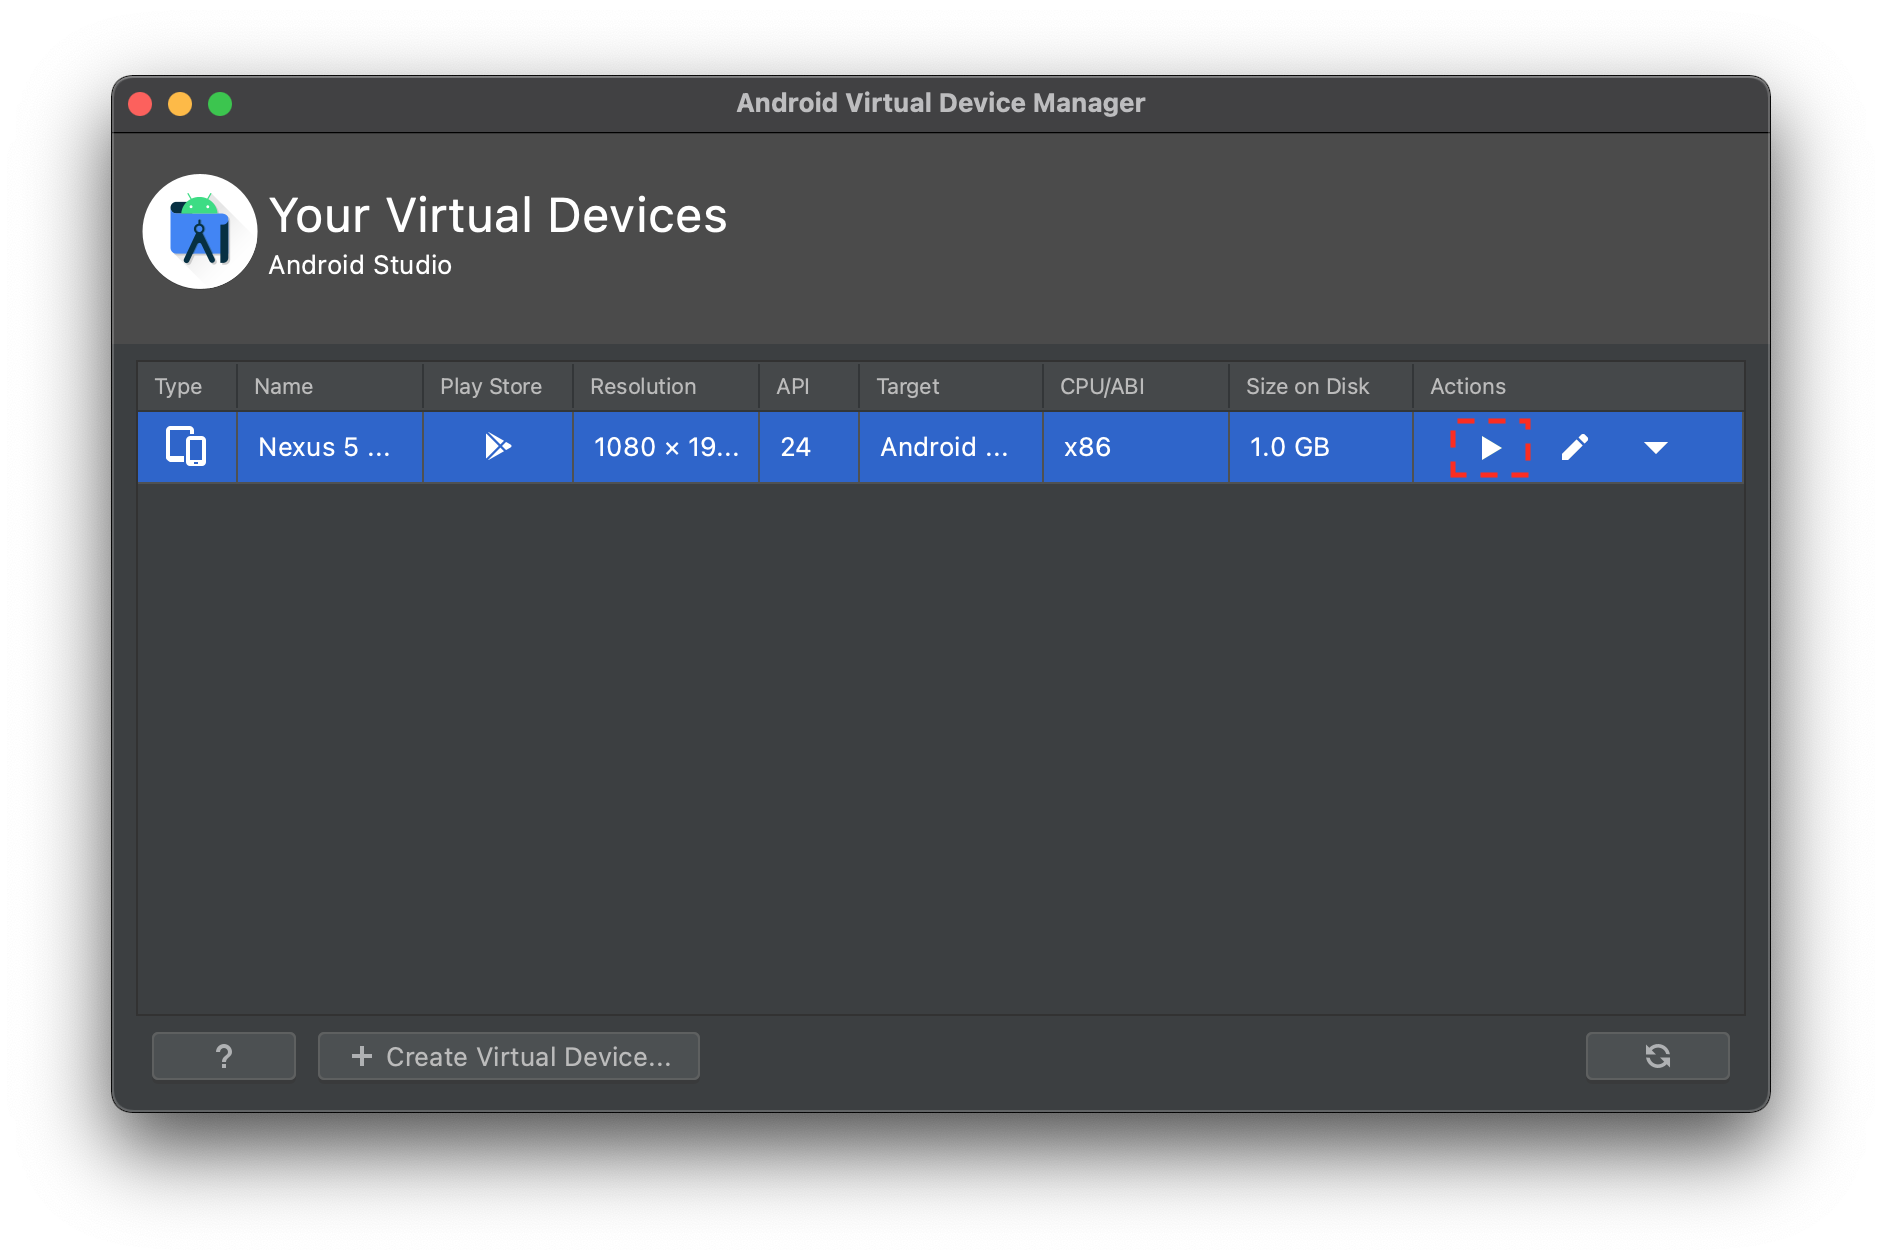 7. Now that your Android emulator has been configured, you can launch the emulator by clicking on the green "play button as indicated above. This should launch your emulator and allow you to test applications!
Getting Help
If you have trouble or need help, please reach out to Dr. Moran on the android-tutorial channel in the REU Slack, or the NRT Slack Channel. He will be happy to assist you!
Tutorial: Developing a ToDo List App
Today, you will be developing a To-Do List application for Android using the Java programming language. While, as discussed in the lecture, Android does support Kotlin, most of you are likely more familiar with Java and it is still supported :-) I have already coded this project and placed it on GitHub, which you can access via the button below. However, you should use this only if you get stuck, otherwise, follow the tutorial below, as it will teach you about the purpose of the code.
Note
This tutorial is adapted and updated from Aldo Ziflaj's awesome tutorial, which you can find here (but the code and structure is a bit outdated).
Step 1: Create a New Android Studio Project

Open the AndroidStudio launch screen and select the "Create New Project" button.
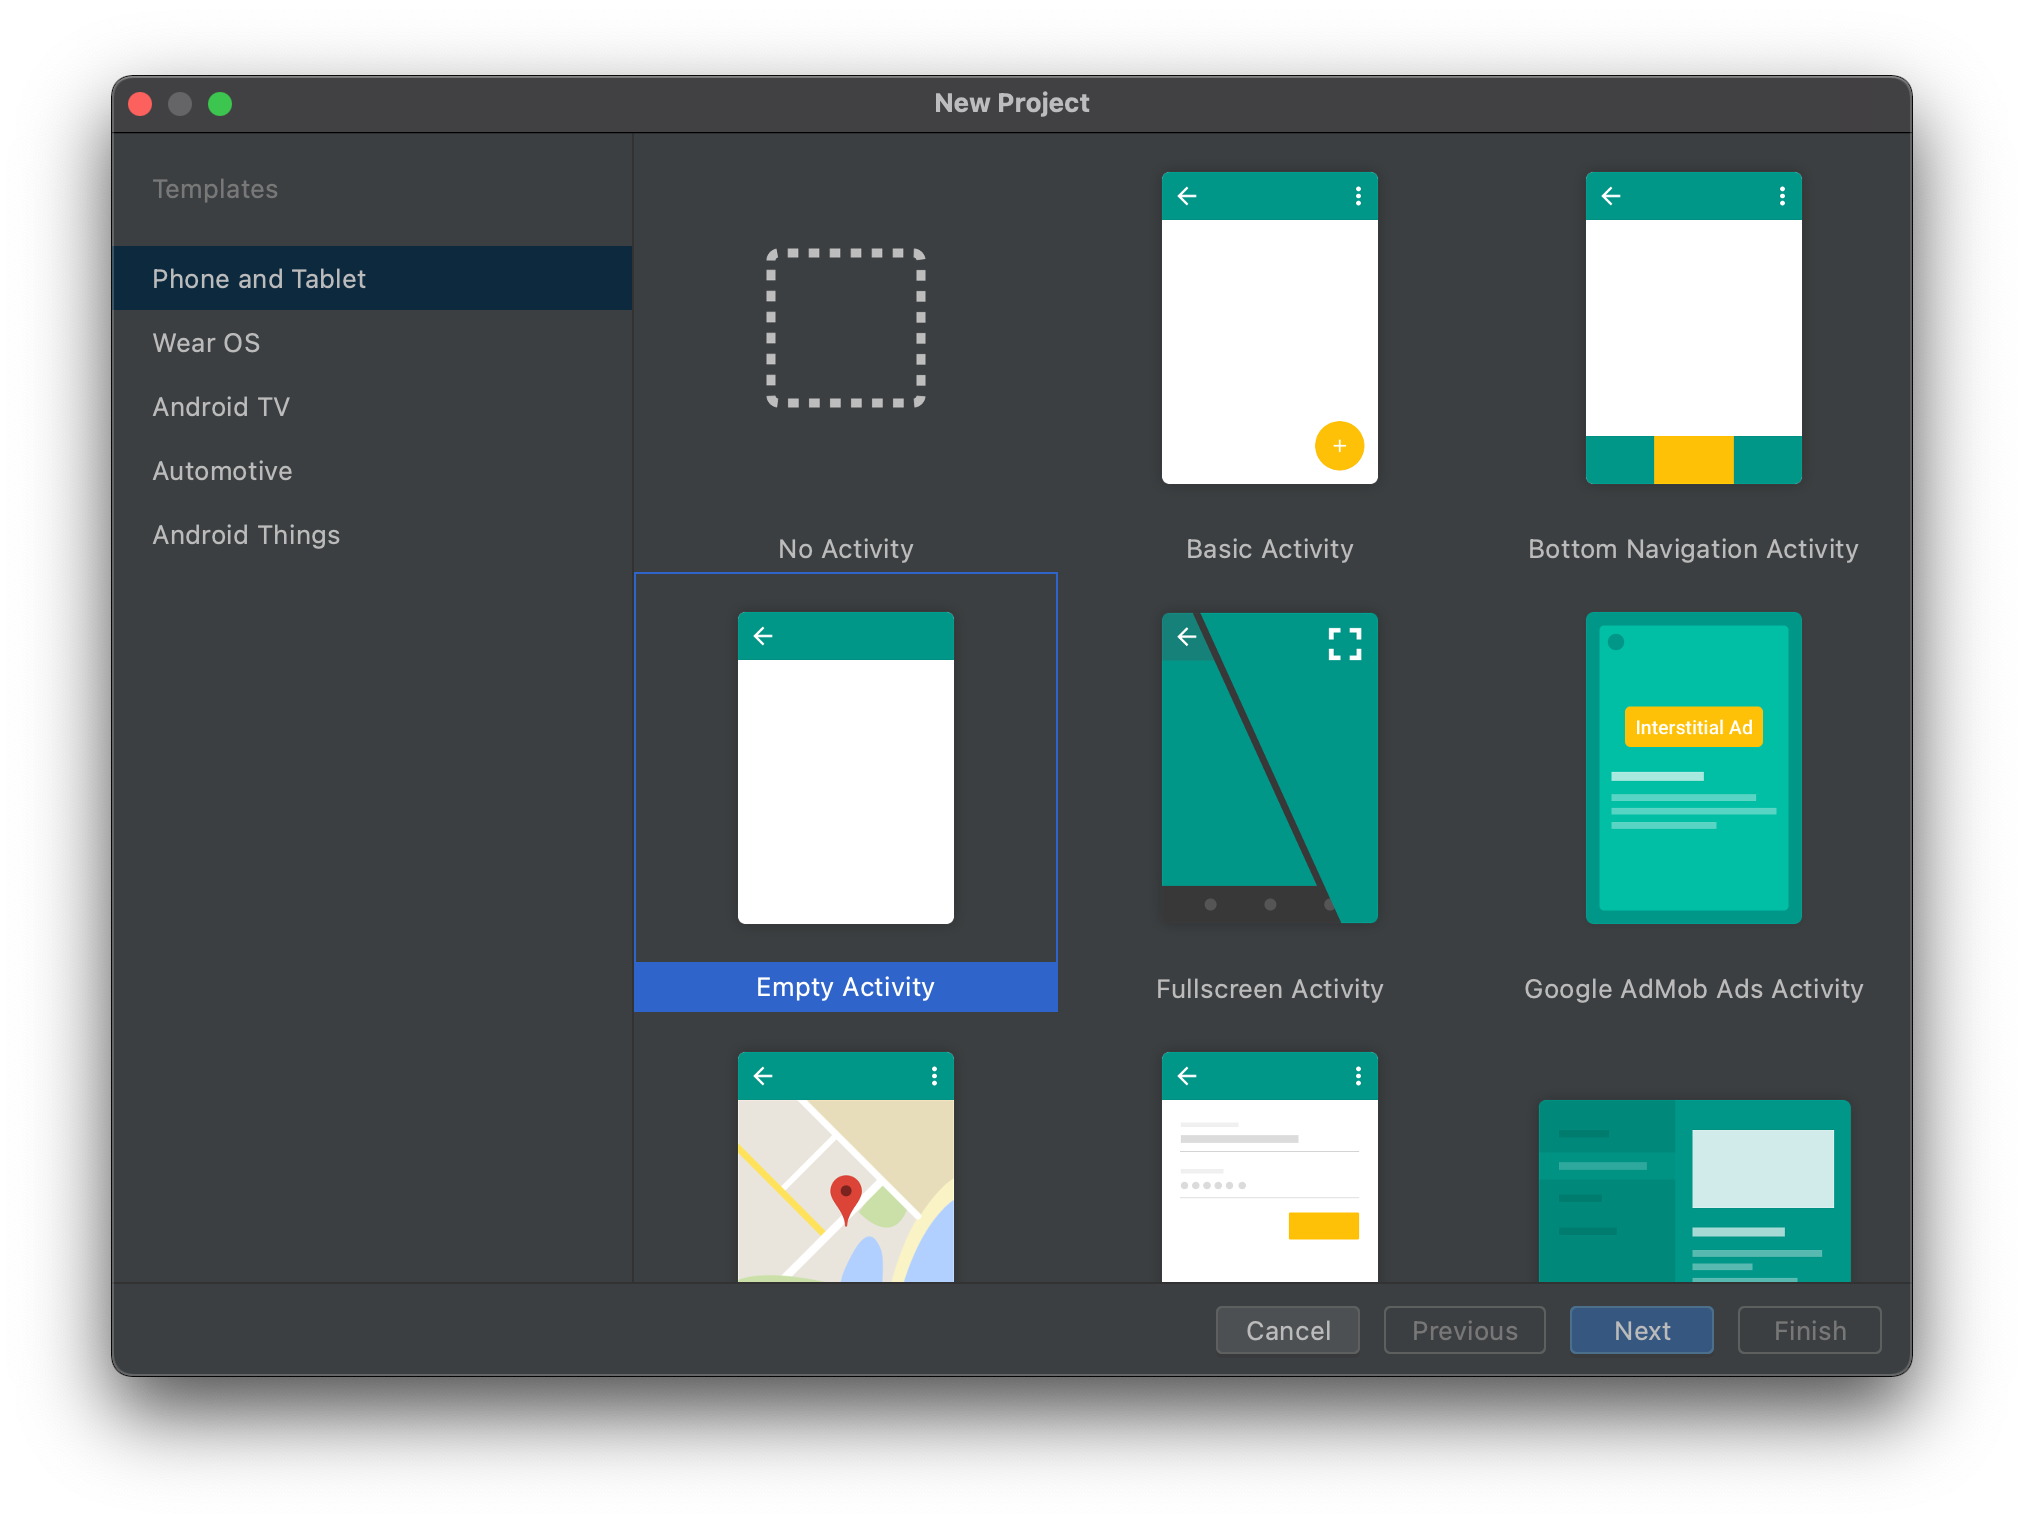
Next select the "Empty Activity" and then click "Next".
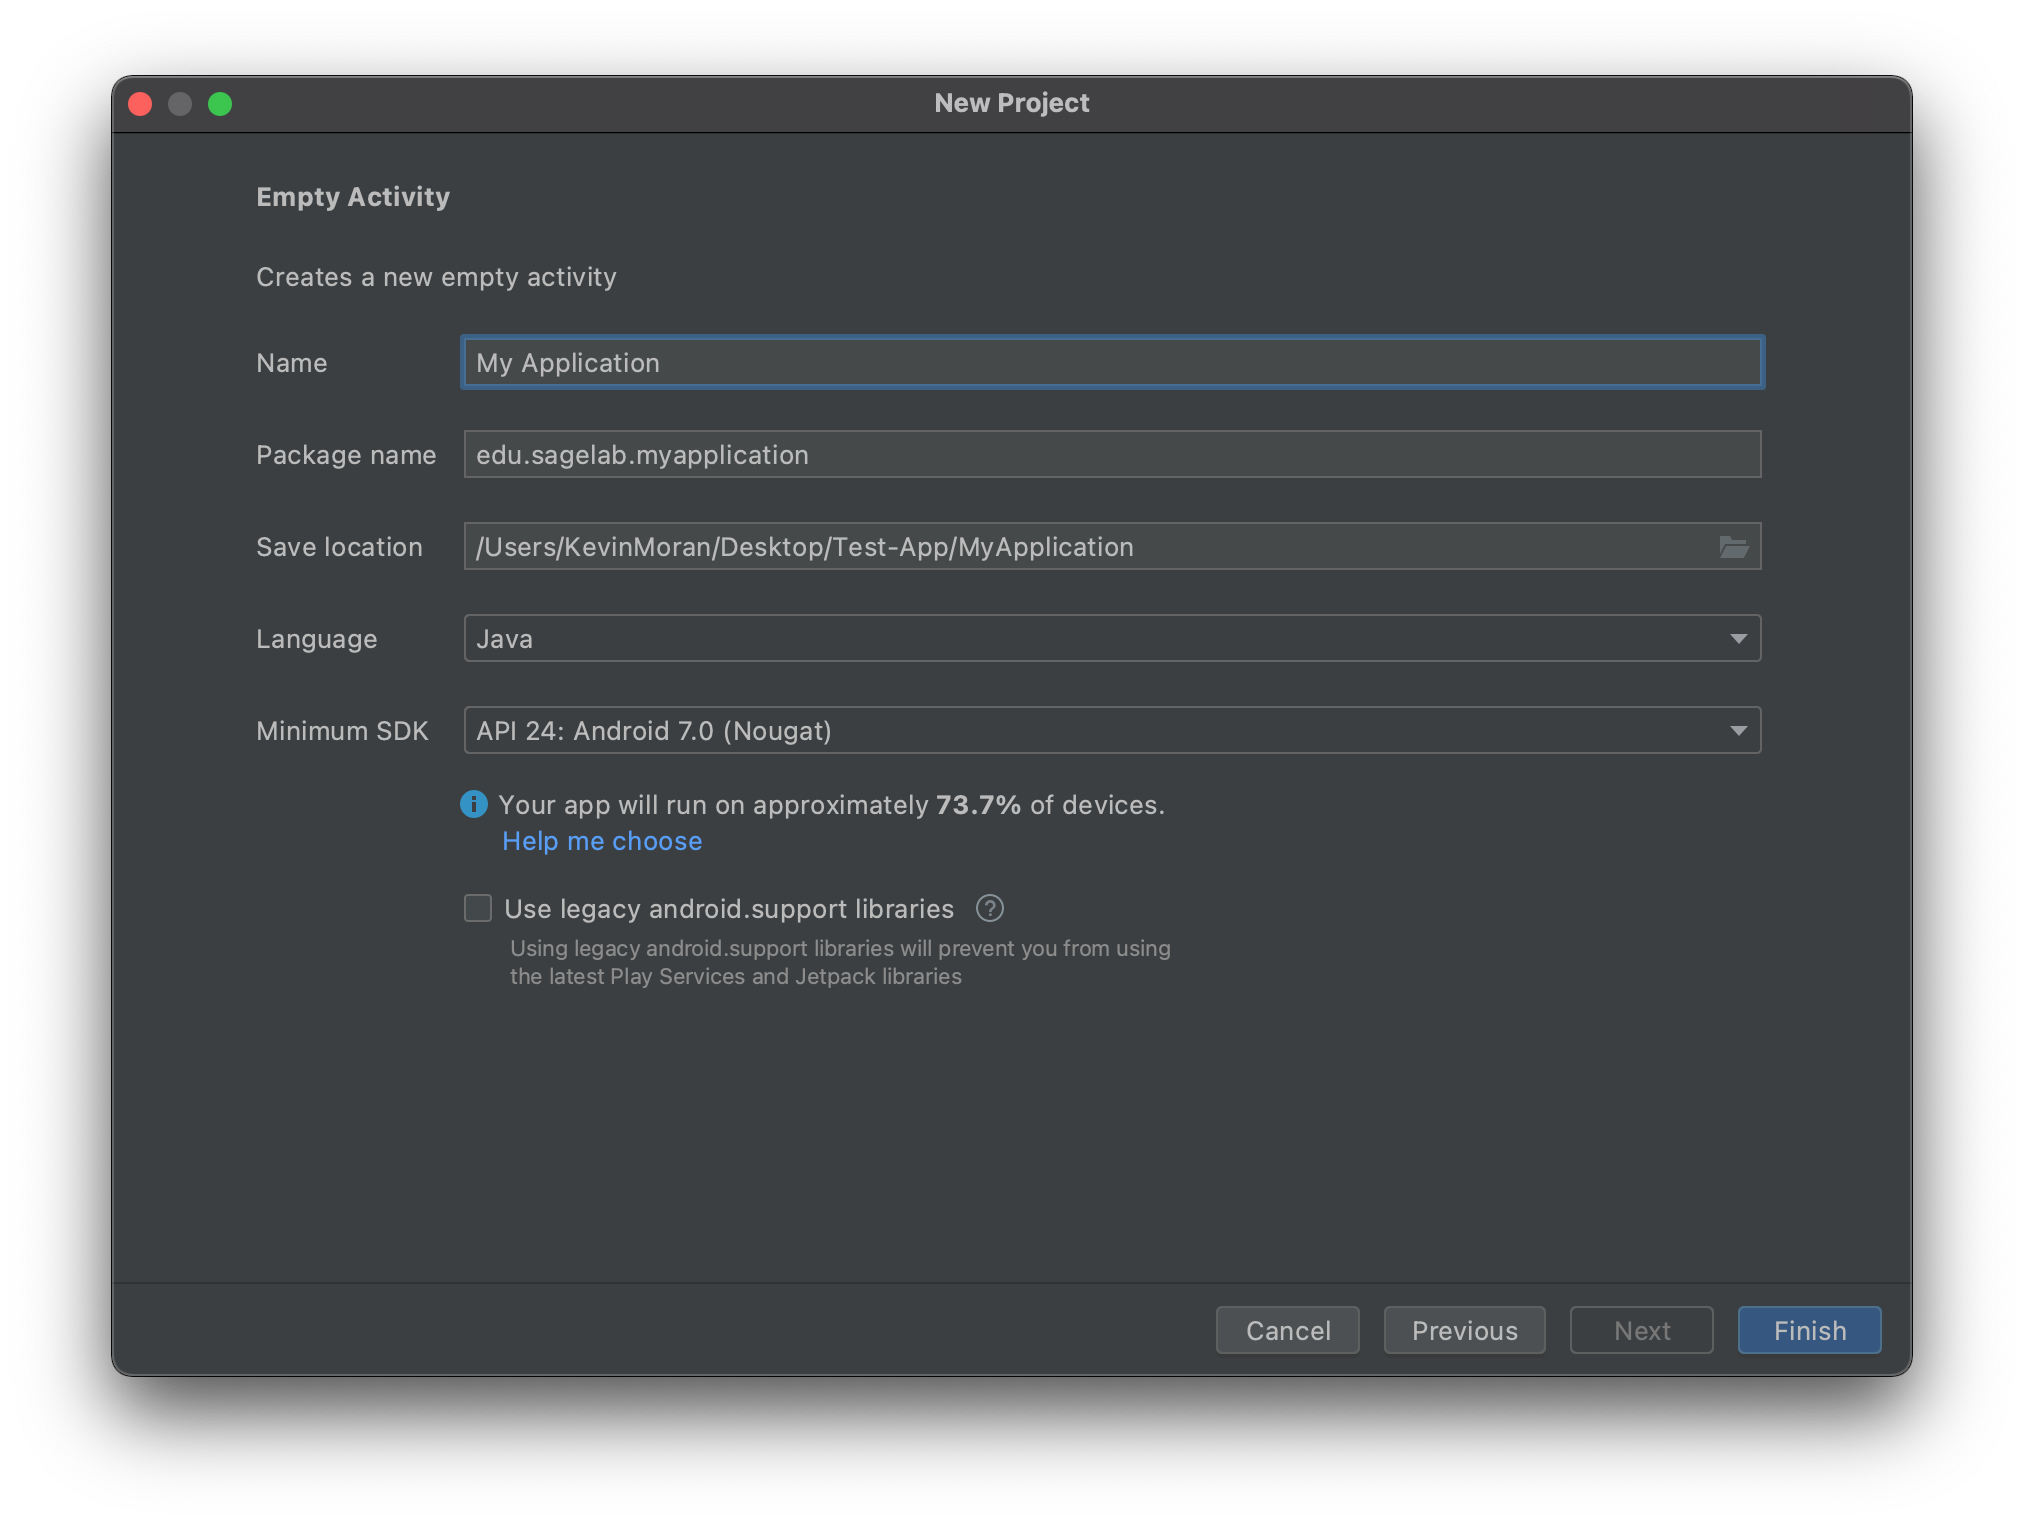
On the next screen, you can configure the general project attributes. First, choose a suitable name for your TodoList project. You can use any name you like. Next, provide a package name. If you are not sure what to use, you can use edu.gmu.<project-name>. Next, select the location where you want the code to be stored on your computer hard-disk. After that, make sure that the selected Language is Java as we will be using Java for this tutorial. Next, set the minimum SDK to API 24: Android 7.0 (Nougat). Make sure the "Use legacy android.support libraries is unchecked. Finally, click the "Finish" button to create your project!
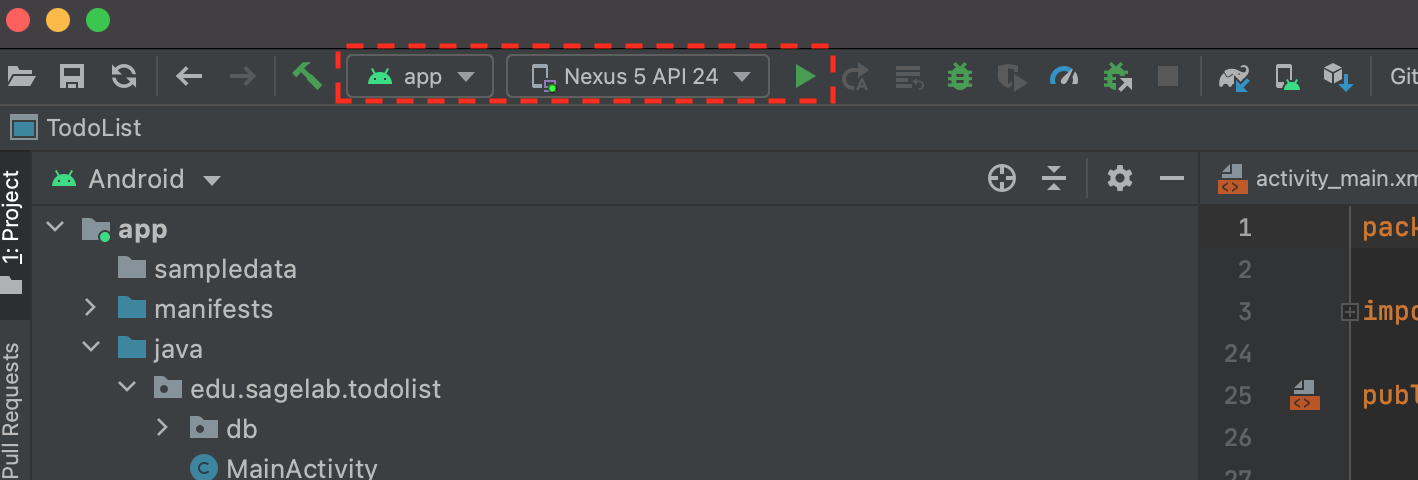
Next, let's make sure your app can run! Once Android Studio finishes automatically setting up the new project, you can click on the green arrow in the menu bar to run your app. This should launch your configured emulator and launch the app!
Step 2: Setting up the UI
In the MainActivity.java class, you should see something like the code below:
1 2 3 4 5 6 7 8 | |
On line 11, you set the view of this activity to R.layout.activity_main, which points to a file called activity_main.xml in the /res/layout directory of the project. To view the layout, select the activity_main.xml file from under the res/layout folder and double click it. This will bring out the layout inspector. However, we will be using the xml code to build this UI. To view the xml code, click on the "Code" button in the top left of the LayoutInspector. You will then see a A vie, that controls layout of the Android interface, that looks like this:
1 2 3 4 5 6 7 8 9 10 11 12 13 14 15 16 | |
In the main view, you will add a ListView, which will contain a ToDo item in each row. To do this, replace the TextView element with the code below:
1 2 3 4 5 6 7 8 | |
Now you will define a list item, which will represent a task in the interface.
Create a new layout file in the /res/layout folder called item_todo.xml. You can do this by right clicking on the layout directory under the res directory and selecting the "New Layout Resource File" option.
You will add two elements to this file, a TextView to show the task, and a “Done” Button to delete the task. Add this code to item_todo.xml, replacing anything that is already there.
1 2 3 4 5 6 7 8 9 10 11 12 13 14 15 16 17 18 19 20 21 22 23 24 25 26 27 28 29 30 | |
The app needs a menu item to allow user to add more tasks. Add a main_menu.xml file in the /res/menu directory, following the same procedure as above. The only difference is you will first create a menu directory under the res directory and right click the res/menu directory to add the Layout resource. Once you have created the main_menu.xml layout, double click it to open it, switch to the Code view by clicking the button in the top right, and replace your code with the following:
1 2 3 4 5 6 7 8 9 10 | |
Next, we need to connect this static UI code to the main cod logic of the app. To do this, you should add the following information to your MainActivity.java file, after the onCreate method.
1 2 3 4 5 6 7 8 9 10 11 12 13 14 15 16 17 | |
Note
You might have some errors related to imports when you copy and paste code throughout this tutorial. To resolve these, simply hover your mouse over the red-underlined text, and then click on import class. This will add an import statement to the top of the class so that the code can properly utilize the referenced library class.
You will likely have an error after this relating to a TAG constant. To resolve this error, add the following line to the beginning of the MainActivity class:
1 2 3 4 5 6 7 8 9 10 | |
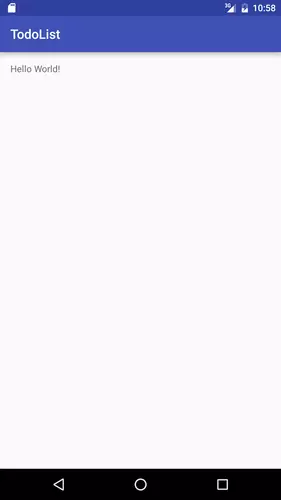
The onCreateOptionsMenu() method inflates (renders) the menu in the main activity, and uses the onOptionsItemSelected() method to react to different user interactions with the menu item(s). If you run the application, it should look something like this:

If you click the add button, you will see something like this in the Android Studio log:
03-26 22:12:50.327 2549-2549/? D/MainActivity: Add a new task
Next, you will add an AlertDialog to get the task from the user when the add item button is clicked. You already know where to add the code to react to the user, so replace the logging statement in the MainActivity (depicted below)
1 | |
with the following code snippet:
1 2 3 4 5 6 7 8 9 10 11 12 13 14 15 | |
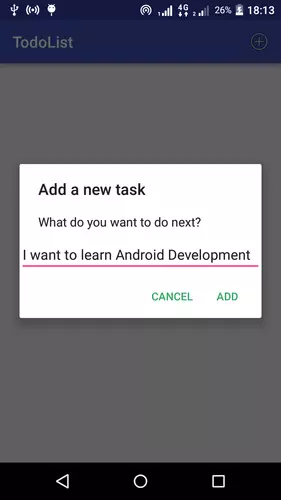
Now if you launch your app again, clicking the plus button should give you this:
Enter some text and when you click the add button, the Android Studio log (“logcat”) will show something like this:
03-26 23:32:18.294 12549-12549/? D/MainActivity: Task to add: I want to learn Android Development
Step 3: Storing and Retrieving Data
Android ships with an embedded SQLite database. The database needs a table before it can store any tasks, which we will call the “TaskTable”. Create a new db package in the same location as MainActivity.java by click on the package path (e.g., edu.gmu.<your-app., select "New Package" and then call it db. Then create a new class called TaskContract with the file name TaskContract.java by right click on the db folder and selecting "New Java Class".
Add this code to TaskContract.java, beneath the package declaration.
1 2 3 4 5 6 7 8 9 10 11 12 | |
The TaskContract class defines constants which used to access the data in the database. You also need a helper class called TaskDbHelper to open the database. Create this class in the db package (following the same method as above) and add the following code:
1 2 3 4 5 6 7 8 9 10 11 12 13 14 15 16 17 18 19 20 21 | |
Now we need to adapt MainActivity to store data in the database. Add this code where you defined the DialogInterface.OnClickListener() for the AlertDialog‘s add button, replacing:
1 2 | |
with:
1 2 3 4 5 6 7 8 9 | |
This makes the whole onOptionsItemSelected() method look like:
1 2 3 4 5 6 7 8 9 10 11 12 13 14 15 16 17 18 19 20 21 22 23 24 25 26 27 28 29 30 31 32 | |
Next, add a private instance of TaskDbHelper in the MainActivity class, directly underneath where we had the tag before:
1 2 3 | |
And initialize it in the onCreate() method:
1 2 3 4 5 6 7 | |
Now we need to fetch all the data from the database and show it in the main view. Get a reference to the ListView created in activity_main.xml file by adding an instance of the ListView:
1 2 3 | |
And initialize it in the onCreate() method:
1 2 3 4 | |
Initialize the reference by adding this line of code to the onCreate() method, right after creating mHelper:
1 2 3 4 5 6 | |
Next we are going to add a method that handles updating the UI. To do this, add the following method in your MainActivity class:
1 2 3 4 5 6 7 8 9 10 11 12 13 14 15 16 17 18 19 20 21 22 23 24 25 26 | |
Add a private ArrayAdatper field to the MainActivity class:
1 2 3 4 5 | |
This ArrayAdapter will help populate the ListView with the data.
If you don’t understand the updateUI() method, that’s OK. Instead of logging the tasks, add them into an ArrayList of Strings. It then checks if mAdapter is created or not. If it isn’t, and mAdapter is null, create and set it as the adapter of the ListView (see below code you already have):
1 2 3 4 5 6 | |
If the adapter is already created (which implies that it’s assigned to the ListView), clear it, re-populate it and notify the view that the data has changed. This means that the view will repaint on the screen with the new data.
To see the updated data, you need to call the updateUI() method every time the underlying data of the app changes. So, add it in two places:
- In the onCreate() method, that initially shows all the data
- After adding a new task using the AlertDialog
See the two code snippets below for where updateUI() should be added:
1 2 3 4 5 6 7 8 9 | |
1 2 3 4 5 6 7 8 9 10 11 | |
Step 4: Deleting Tasks
After finishing a task, it should be deleted from the list.
Open the item_todo.xml layout and add this line to the Button tag:
1 2 3 4 5 6 7 8 | |
When the button is clicked, it calls this method deleteTask() in the MainActivity class, which you should now add:
1 2 3 4 5 6 7 8 9 10 11 | |
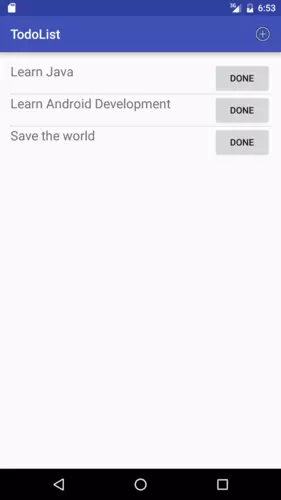
Now, clicking the Done button will delete the task from the list and the SQLite database!
Now run your app to test it out! You should see functionality similar to that indicated below:
Final Step: Congratulations!
Congrats on Building your first Android app. This app demonstrates some important features of Android, such as how to set up a UI View, how to connect different components together, and how to store data from an application.
If you made this far and you want to explore more, check out the Bonus Tasks you can try below. These tasks have much less direction, and expect that you will look up some information on your own.
Bonus Task 1: Change the Look and Feel of the UI
For this bonus task, you should use the LayoutInspector to change the look and feel of the UI. For example, try to set the theme to GMU colors, and explore different fonts or layout configurations for the tasks!
Bonus Task 2: Add Due Dates
For this Bonus Task, we are challenging you to add due dates to the ToDo list app. This will require modifying the AlertDialog the database and the item_todo layout resource file. Check out the following resource on how to use the DatePicker component.
Bonus Task 3: Allow Tasks with Images
For this Bonus Task, you should modify the Tasks so that the user can add an image to them, in case they need to reference it later. For this task, check out this SO post that provides some direction on how to get started with this.